This might just be a quick reference for freeing up disk space on the server, with a little bit of chit-chat thrown in.
Docker is seriously hogging your space on the server. Don’t believe me? I was in the same boat as you, but it’s cool, though. You know, working for a company puts you at risk of inheriting a codebase and systems—none of which are your own handiwork; they’re just handed over to you to manage. Then one random day, you check your server and see over 50% of your disk storage being consumed. Intrigued? Yeah, me too.
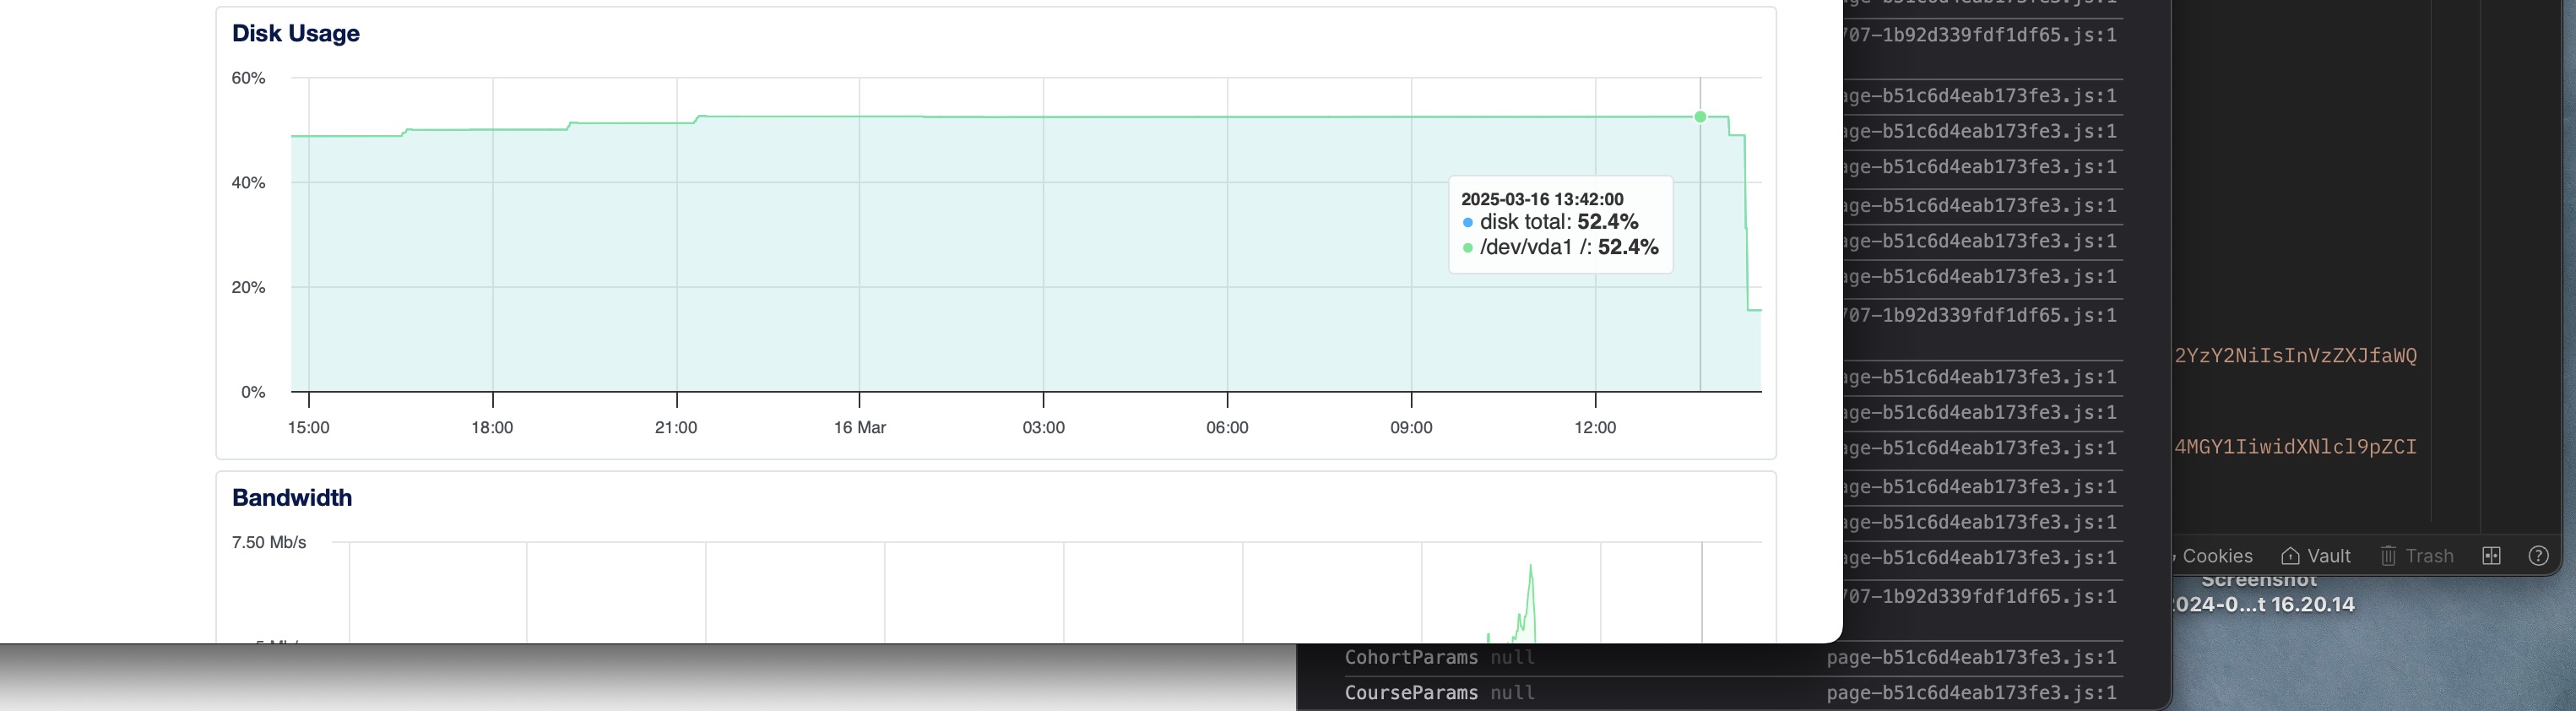
50+% usage
WHAT THE HECK IS HAPPENING?
“Okay, the basics, you might just skip all this and go down“
You SSH into the server yep, straight into root—living dangerously, I see. You run ls -lha in all the folders, checking them out and looking for the most used ones, but that approach isn’t cutting it. So here comes du—short for disk usage. Now we’re going to drill down into each disk available on our server. You try du -h /var, which is the base for our disk storage on the server. There are other options that come with the du CLI command, like --max-depth=N, which limits the depth of directory scanning. For example: du -h /var --max-depth=1 This command shows only the immediate directories within /var without going deeper.
Another handy command to concatenate for easy reading is the sort CLI command. Pairing it with du gives us the best, most readable response. So the command becomes: du -h /var --max-depth=1 | sort -hr. In layman’s terms: "Check the root directory and list the highest disk usage to the lowest in a human-readable format." This gives you a list of root directories, from the biggest space hogs to the smallest, and from there, you can dig deeper. In my case, I could see /logs and the /lib directory taking up a ton of space. With this info, you can drill down further. For instance, if my logs aren’t auto deleting redundant or old entries, I’ll spot it with du -h /var/logs --max-depth=1 | sort -hr. It’s just that easy — I’m talking about the drilling-down part.
“Now comes the real troublemaker”
Docker: The Silent Space Hog
I don’t know why, though, bro, but I can save you here. If your logs are eating up your data space, you can use systemctl to delete old logs. Don’t just delete the file, though—do your research and only remove the past ones. Better yet, tweak your config so logs don’t stick around forever.
“Vim into that thing, bruh.”
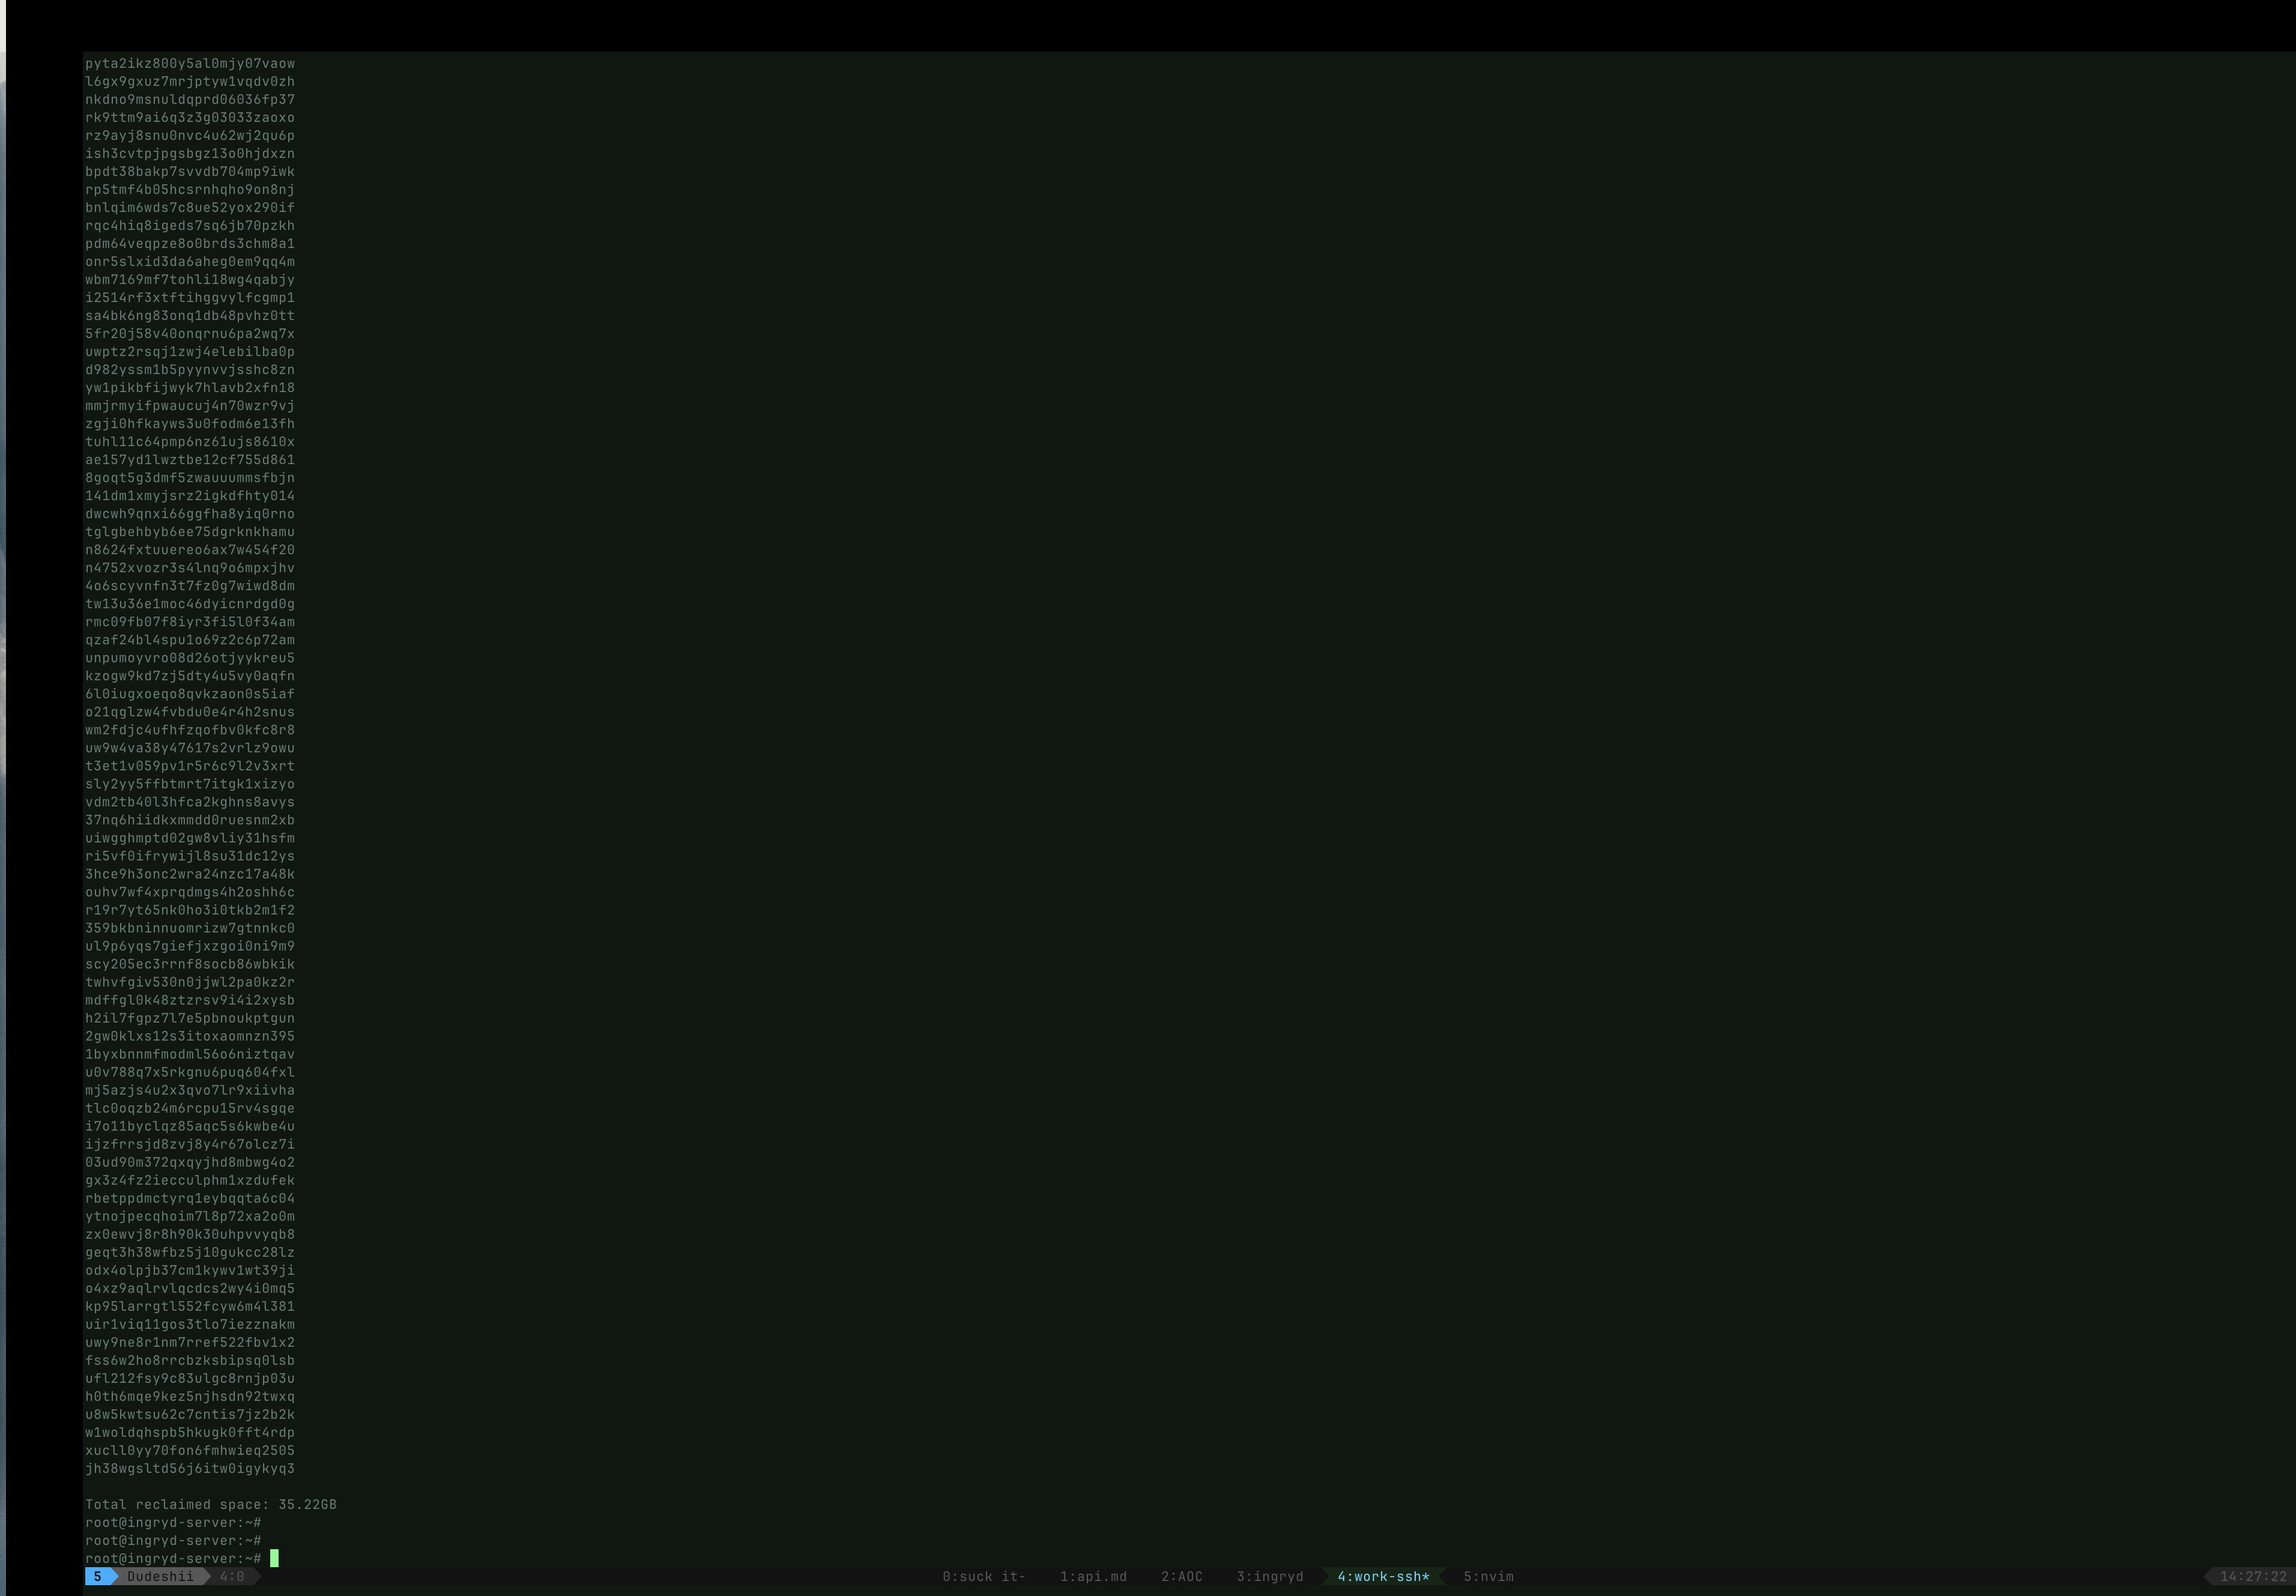
But in my case, Docker was the real culprit—stealing 40GB of my disk space. And I needed it back. How do I reclaim it? Docker provides some CLI commands that show storage details, including reclaimable space, and even commands to clean up those spaces.
Let’s dive in. When you run docker system df, it displays Docker’s disk usage along with the reclaimable space. Some people say not to clear everything, but if Docker itself says the space is reclaimable, why limit yourself? –Just an opinion, though. In Docker, we have different resources like images and containers. In my case, I was getting 35GB of free space from my image resources, and you know I had to claim it. Running docker image prune -a gave me all my storage back.
“Dang, what more do you need in life? This is why man lives.”
Now, maybe you’re the inquisitive type who wants to know what’s being deleted before pulling the trigger. You can run docker image prune --filter "dangling=true" --dry-run. The --dry-run flag lets you see what will be deleted without actually deleting it. You can swap out the resource names to check the necessary details. But if you’re the “I don’t care, just get it done” type who wants to move on and keep writing code (the dream of all men), then check this out: docker system prune -a --volumes. This CLI command might not be for everyone because --volumes deletes unused volumes permanently, which could wipe out important data if containers rely on them. But it removes everything—unused images, stopped containers, networks, volumes, and cache.
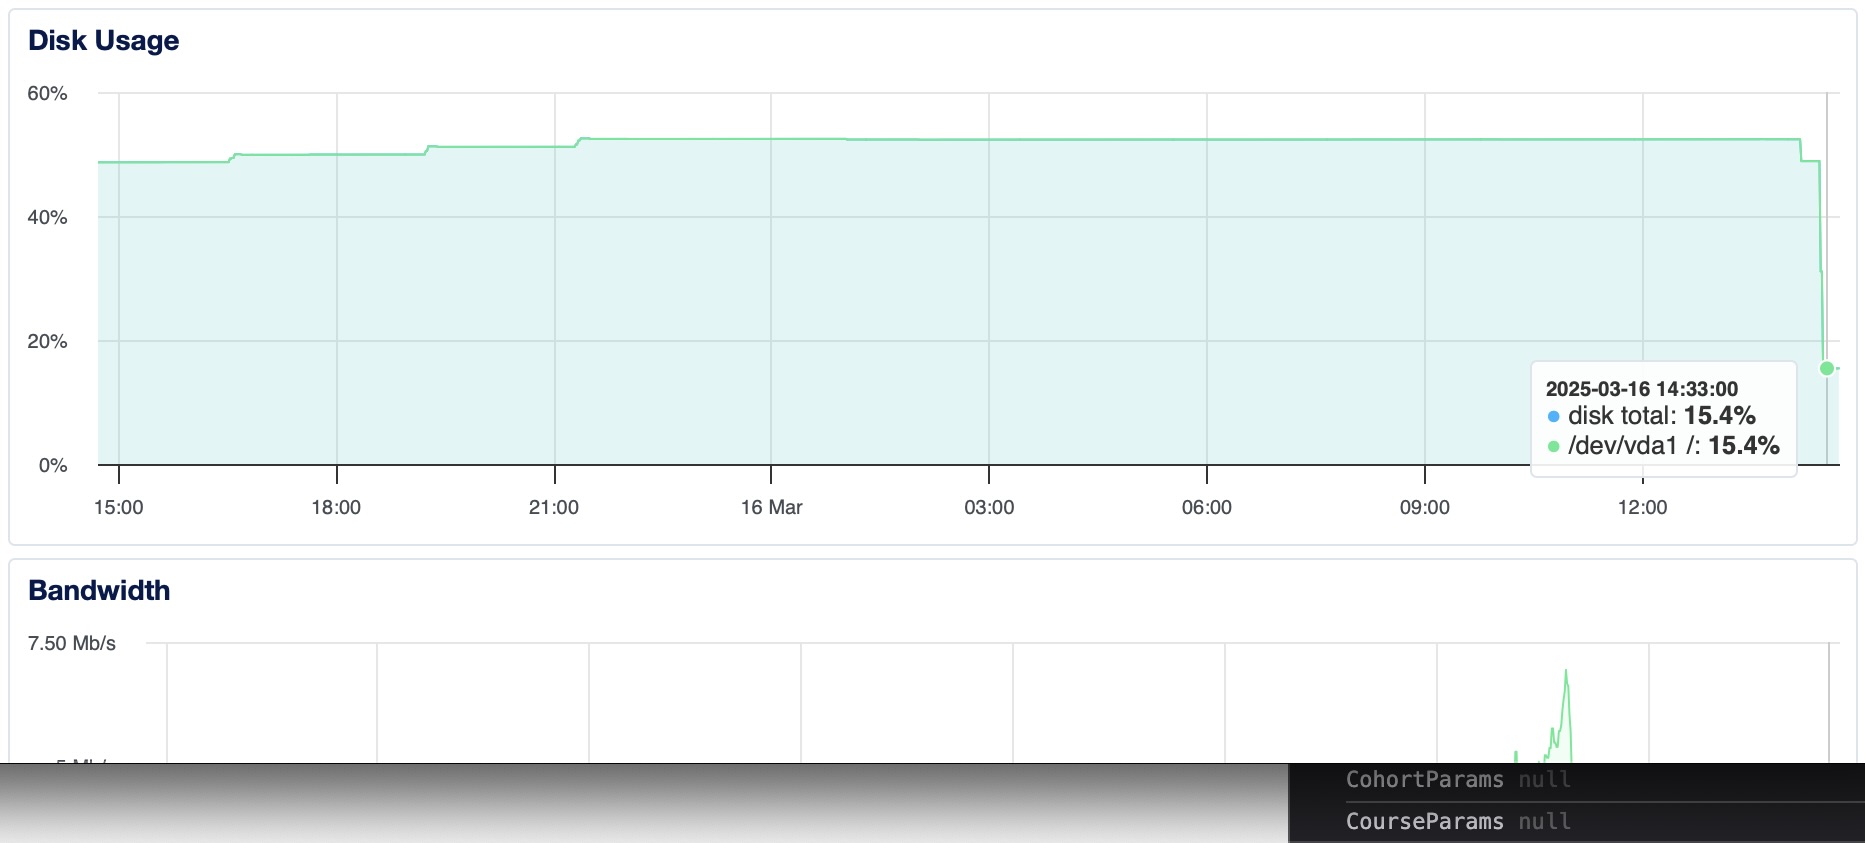
15% usage
a freed bruh stays freed